Showing posts with label Science Fiction. Show all posts

February 11, 2019

Reaper Bones
UFO
WWW2 Style

(picture taken from the official product page)
It is getting weird. Last year at the Hamburg Tactica I bought an UFO from the Bones range of Reaper Miniatures. Reaper offers with their Bones sortiment a big range of miniatures for pretty low prices. The reason for this is that the miniatures are made from PVC. This means that the figures as also their details may be pretty soft.

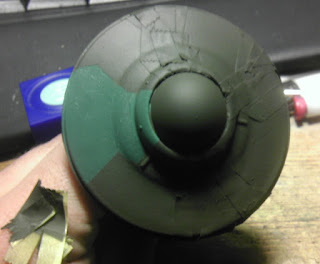
The UFO was stashed away until I suddenly knew what I would do with it some weeks ago. With some modifications it would look like...
The first thing I did was to build 3 gunstations from plastic pearls and plastic rods, and they look ok for a spontanous project. I did not use the landing gear that was included and added a clear plastic rod for a flying base.
This thing was built and painted on a single afternoon.

When all glue was dried I went on with the paintjob, as you can see on the picture above I gave it a two color camouflage with hard edges on the upper side while the lower part was painted in turquoise, all done with Revell Aquacolor paints.
The decals were taken from the scrapbook as usual, I think the crosses came from a Zvezda kit while the yellow pieces came from the Meng Tiger I or II.

The flight stand is not final, also left to do is to build a base for this thing and then its ready for usage. You may already know for what I will use it, this will be totally ridicuolus, but you will have to wait for more infos and eventually some new custom cards until I write a post about it in 2 or 3 weeks.

In the meantime we are working for the weekend, and maybe the Montagsmalers will meet once more this week to continue their roguish projects. I hope I will find some time this week for one or two more posts, so many things to take a closer look at, but if I do not, you may stay ready for next week, I will try to make lots of pictures at the tactica just like last year.

January 25, 2019

Space
The Final Frontier

No, this aint' Star Wars. It's better.
Work in progress pictures of my Battlestar Galactica kit, it is made in 1:4105 by Revell with molds from Moebius Models, who design a lot of starship kits based on the remake of the Battlestar Galactica tv show and other science fiction series.

The 2004 remake of the classic Battlestar Galactica show, get some background informations about BSG in this PDF, is my favorite tv series ever, I could write much about it, and I was lucky when I got the Revell version of this modelkit for a low price at the bay, even when it was already started and 2 small parts were missing.
It was built but then I stashed it, I had other kits to finish on my priority list.

The first thing I did last weekend was to give the kit a layer of primer, for this I use some cheap stuff from the discounter, this stuff is pretty good but needs some time, I gave it 24 hours to dry.
The next step was adding grey, first a complete base layer, then I highlighted the armourplates with a lighter grey. After this I gave the kit a good layer af matte varnish, normally you use glossy varnish, later more on that.
And I absolutetely recommend using a airbrush for kits of this size.

This was followed by a premiere, for the first time I used a selfmade wash based on black oilpaint mixed with lightergas. I read so much about this that I had to try it for myself.

In German it would be easier to describe this than in my crappy English. If you want to try it for yourself , just look for tutorials on youtube.

Usally you need to use gloss varnish for a protective layer, the glossy surface protects the acrylic color from the solvent of the wash and of taking the oil color, but I used matte varnish because I wanted give the whole ship a dirty look.
You can find much better tutorials on this but all you have to do ist to apply the wash, wait some minutes and then start to rub it off with papertowels and cotton swaps.

Depending on the pressure and the rubbing  you will get the result that you want. The final step before you continue to paint this thing is to add another layer of glosscoat, because the oilcolor will not dry completely, it will cause a mess if you do not do this. Use only matte clearcoat if you want the colors to get dull, I used matte because I wanted this effect.

After that I applied some generic grey, not completely, only a very heavy highlighting. This is the actual building state of it.

A detail shot of my Revell Hind kit give you a better view of the look of the highlighted panel lines. The rest of the black was rubbed away. It is not perfect and I may redo some spots, but for my first real try (with glosscoats) of this technique I am pretty satisfied with the result. More on that and (of course) the Hind will come in future posts.

The big advantage of this is that the oilpaint will not completely dry, you can pause whenever you want, all what may be needed is some lightergas to get the paints wet again. And will need a proper stock of cotton swaps since you will need a lot of them.

The base of the stand was painted in Antikbronze, sealed with glosscoat and then I added a layer of oilwash. It was the first time I used metallic color through my airbrush, I had some concerns about cleaning the pistol after that. Maybe I will redo this thing, there are 2 spots that I messed up.

Beside of finishing this kitten, this weekends task is to finish the Galactica, instead of the red decal stripes I will use paint for them, this will definitely look better. I have to go through my source material since I have questions about coloring of some of the details.
At the moment I am preparing some posts, they will appear this weekend.


So say we all.

February 8, 2010

Figures Of The
Buck Rogers Boardgame


I found this game at the flea market one week ago, and I bought it only because it contains a lot of figures. The price was 4 Euros. The basic rules in German were included too, maybe I will make a game if find 5 other players.

After I came home the first thing to do was counting all parts to see which parts are missing. It was not complete, but there were only 3 little parts that were missing: 2 of the hero figures and one planet marker were not there. But this is no big problem, I think that I can replace theses parts.

The four remaining hero figures


The Gennie Troopers (48 figures in 6 different colors)


The normal Trooper (120 figures in 6 different colors)


Additional informations about this game can be found at the website "The board game geek" following this link.

This last picture shows a size comparison between the board game figures and some other 1:72 figures.
From left to right: Revell German Paratrooper, Buck Roger Gennie trooper (same size as the heroes), Caesar Handschar, Buck Rogers normal trooper, Airfix Afrikakorps, Esci German Paratrooper.