February 8, 2019

TANKS The Modern Age:
The War Goes On

Today me and my mate Olli continued our "TANKS The Modern Age" campaign. For this second battle we changed sides, he went on with the US forces while I commanded a Soviet tank platoon. Since no reinforcements had arrived, we used platoons as in our first game.

The Soviets were advancing to the outskirts of the Bavarian town of Auerbach where the Americans waited for the enemy in defense position.

The Russians rushed forward while the Americans secured their positions at the border of Auerbach. Whose fate was it to win the battle ?

First blood was scored by the Americans, the brave crew of Alpha 66 destroyed one of the enemys T-64. But this did not stop the Soviet strike, in the next round the first M1 Abrams was destroyed.

The battle went on with heavy losses for the Americans, and finally, the only unit which was left for them was their artillery unit, more informations about this custom unit can be found in this post.
But in "TANKS The Modern Age" artillery units are very fragile without any armourpoints and only 3 lifepoints, so this unit was destroyed like it was made of glass.

While the victorious Soviet troops celebrated their victory over the Western aggressor, a mighty thunderstorm arrised. After a series of strange explosions a bright flash appeared and a whole tank platoon had suddenly disappeared.

Could it be that the USA continued their experiments on timetravelling after the tragic incidents in Philadelphia 1943?

The next match will be another civil war. The brave forces of Mother Russia are attacked by an unknown enemy with highly advanced machinery.

February 6, 2019

Rubicon Models
28mm T-34/85

In the previous post I showed my 3d printed/Rubicon hybrid T-34, in this post I show my first finished T-34 from Rubicon Models. It is the T-34/85 in 1:56 scale, a perfect addition to any 28mm Soviet Army.

Building this thing was pretty simple thanks to the well made instructions included and the general quality of this kits parts.

The paints I used were the same as I used for the first 28mm T-34, except for the wash I used on this kit, this time it was Dark Brown Modelwash from Vallejo, mixed up with some Armypainter black wash and a few drops of water. While it still was wet, I removed some of it with a wet brush.

The white stripe was painted with Revell Aquacolor matte white. I masked its shape with tape, and added it with a paintbrush. When it was dry I added some damage with the cuttermesser.

The decals on the tank came from its box, they and the stripe got a coat of thinned GW Gryphonne Sepia wash before the kit was sealed with glossy varnish.

As next step I had another try with Vallejo pigments. I used a mix of Green Earth, Light Slate Grey and water, which I applied generously with an old brush.
When the pigments were dried, I brushed all of them I did not want on the kit away with an old toothbrush. The remaining pigments were fixed with spiritus, then the model got its final coat of matte varnish, as usual I used Revell Aquacolor matte varnish mixed with water on a 1:1 ratio.

By the way, the base green I used on both tanks can be seen on the right of the picture below. Properly thinned it works well with the airbrush.

A comparison shot of both tanks does not show their small size differences on a first view. A closer inspection shows the difference, but I think it is tolerable.

A new entry for the box. As usual I have no idea what I will do with the finished models, but until I find a proper use they will be stashed away in a box like all finished kits, except for this one. Maybe it is time to get a display case for my finished stuff.

The last picture is pretty bad, even for me, but it shows the first 4 steps of the paint process: primer, basecoat, drybrushing, wash. The first hull shown is not from this tank.
You can see pretty well, that I added some metallic look with a pencil to the engine grills, I like the look and all parts which are overdone can be cleaned by the careful use of an eraser.


February 2, 2019

Part Rubicon
Part 3D Selfprinted
28mm T-34/76

Finally I finished the paintjob on my T-34, built from a 3D printed hull, see this post, and the bits leftover from building two different T-34 made by Rubicon Models. Since there were so many bits leftover, I had do do another session of bitsrecyling.

The kit got primed with AK Interactive Russian primer, then I added a coat of a generic green as basecolor. That green was toned down with grey and used for a heavy drybrush, followed by a dark brown or black wash.
For the next step I mixed some Vallejo pigments with water and applied the thin paste very generous on most of the lower regions of the tank and some of its upper regions.

When the pigment/water mix was dried I removed as much of the pigments as I wanted to with a dry toothbrush. Then the remaining pigments were fixed with spiritus, a method I found at this forum, it worked pretty good.

The next step was to add some decals, I used the decals from the Rubicon kit. I used the method described in this post. The Rubicon decals came in pretty good quality but needed more time than other decals spent in the water.
The slogan above the red star came from Peddinghaus Decals, the decal was very thin, just as the "Flames Of War" decals from Battlefront Models, it alos needed a lot time in the water bowl. The horse on the right came from an AER (?) T-34 kit.
Finally the kit was sealed with Revell Aquacolor matte varnish.

I am very satisfied with the result. Especially the decals look pretty fine. As also the pigments. When I made my first experiences with pigments, most were blown or washed away by the airbrushpistol when the model was sealed.
But now, when I fixed them with some spiritus, after the final sealing the pigments are still visible as desired, which was not the case on this jeep.

One of the Mariya Oktyabrskaya miniatures from Stoessies Heroes, shown in this post, just as size comparison for the tank. The figure got a quick and dirty paintjob to use her at the Rügen'46 game last year. When I will find some time she will be repainted.

And another time the Montagsmaler went rogue on another Saturday. Olli helped me with the repainting of the windmills shown in the picture below which I got from this lot. Their paint was chipped, so I airbrushed them and he dried the paint with my hairdryer.
At least the finished bases can be seen on the T-34 pictures.

These things will be scenery for "TANKS The Modern Age", they will get their own terrain rules:

For tanks they are unpassable terrain but do not block the line of sight.
For helicopters they are unpassable terrain on both altitudes and do block the line of sight on high altitude.
Missiles will also be blocked by the windmills on both altitudes.

Just two weeks left for the Hamburg Tactica 2019 where I will pick up some helis and AA units, then it is time for the NATO to conquer the East.

January 30, 2019

TANKS The Modern Age:
Let's Start A War !
The First Game

The first match of TANKS The Modern Age between me and my mate Olli. We decided do do a 100 point match, using all tanks I have at this moment. We both had 68 points in tanks, leaving 32 points for crews and upgrades.

We talked about what to do with missiles since now we got no feedback from the official Facebook group. But it is only logical if they can not be blocked. There are some other small rules changes we made, but that were the same changes we do for the ww2 version of this game.
-
Update:
We got an response from their official Facebook group. They state:
"the target would get normal defense rolls. the missiles 
rules don't say anything about ignoring defense dice."
Hm, seems I was wrong with my interpretation of missiles rules.
-
The dice decided that Olli had the initiative advantage for the first round.

The attacker, this time it was the Soviet army, was played by Olli. It contained the two T-64 from the starterbox, a T-72 and a 2S1 howitzer, which is a custom unit, you can find its card in this post.

They were pretty good equipped and ready to fight. Since there was only one T-64 card in the starterbox, I went to the local copyshop and made a copy of the T-64 card which I already had.

The 
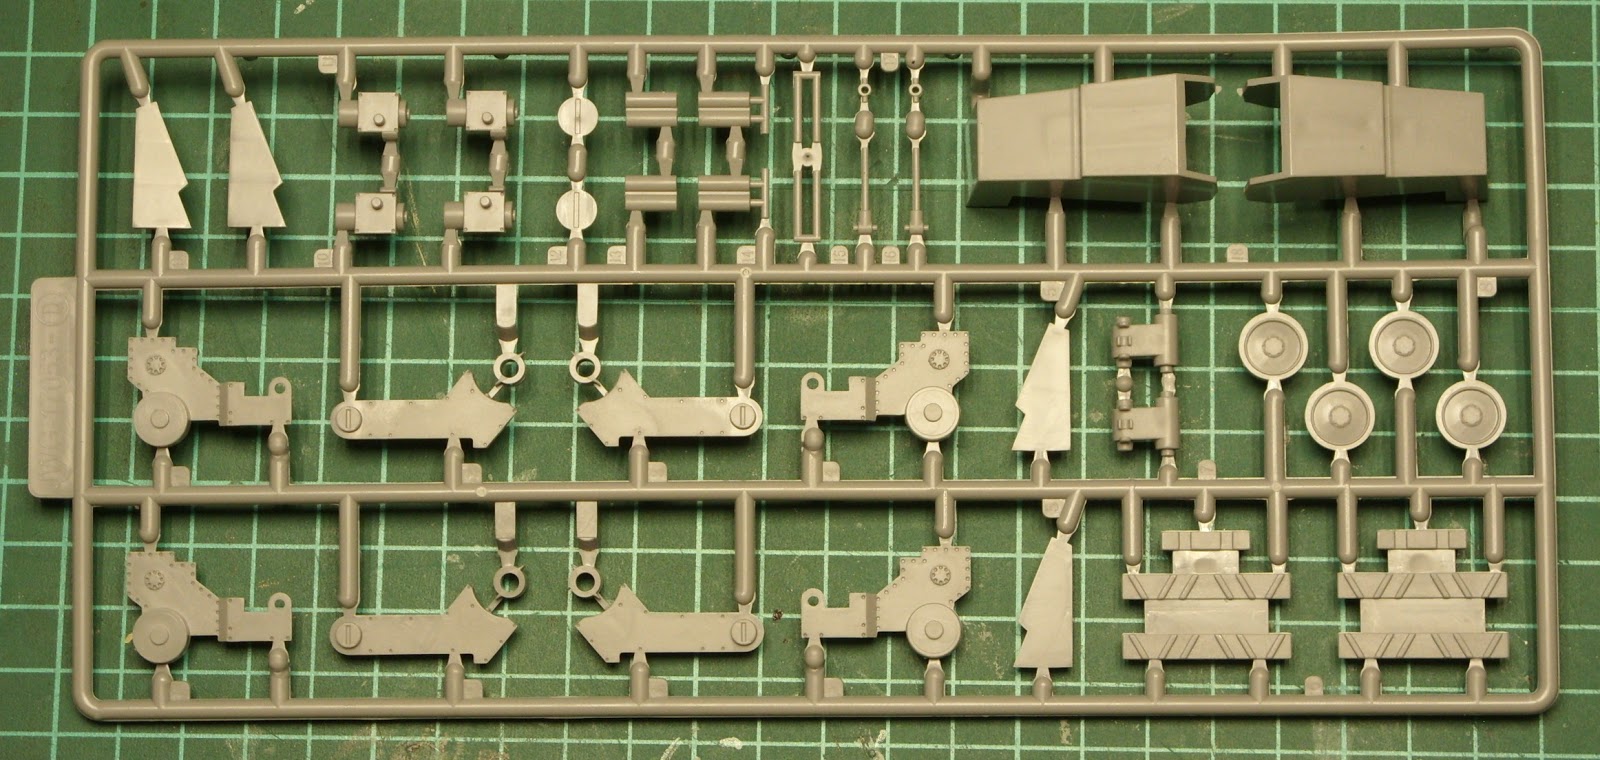
US troops had the role of the defender and were played by me. I had 4 tanks to dispose, two M1 Abrams, an M60 from the Plastic Soldier Company, I took a closer look at it in this post, and also I had a custom artillery unit, the M109, you can find its card in this post.

I almost got the full crew of Alpha 66, but also the other crewmembers and extras were a nice addition to the strong Abrams tanks.

The use of modified tradingcard hulls made the handling of the cards a lot easier.

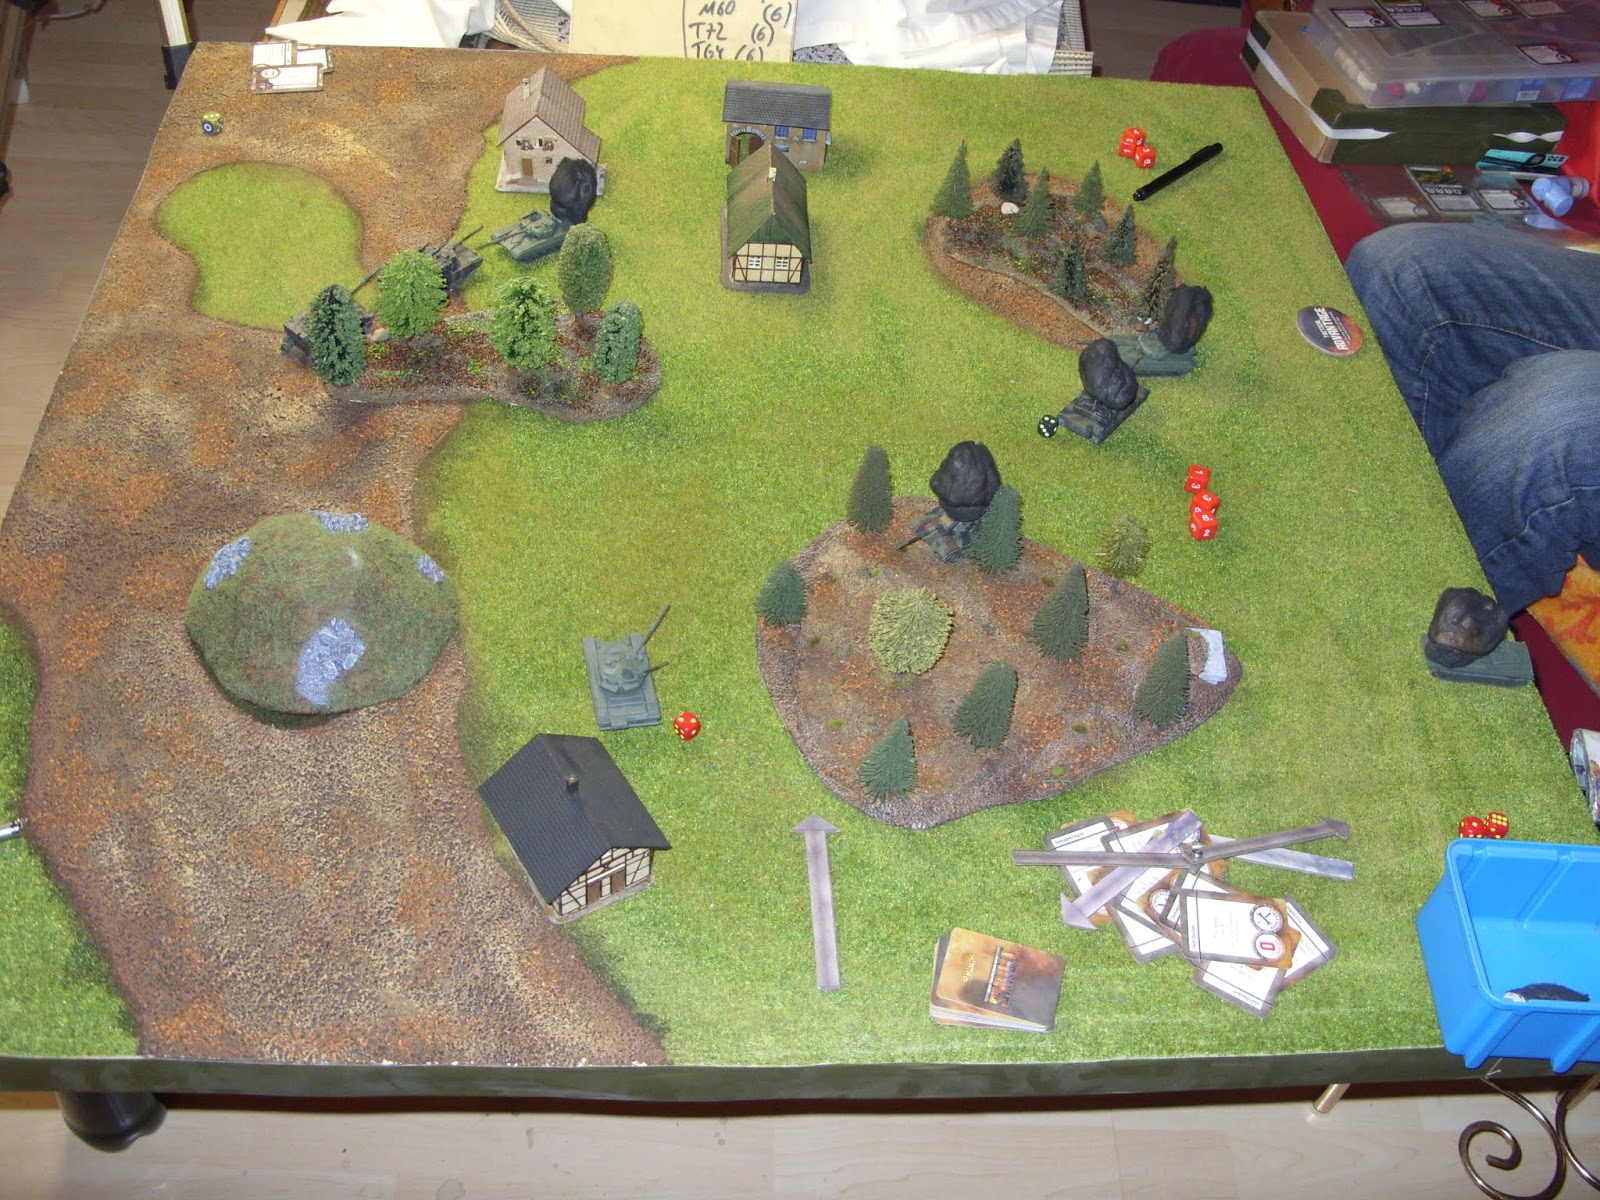
The pictures were made at the end of each round. The initiative counter should lie on my site of the table on some of the pictures, but we forgot about it.

Round 0:
The fight is ready to begin. After we placed the scenery, we deployed our tanks and were ready to start the first round.

Round 1:
Nothing big happens, the US artillery got its first shot but misses almost completely. Except for one M1 Abrams and one T-64, no other tanks had the opportunity to fire.

Round 2:
First blood. The Soviet artillery was crushed by its American counterpart. It is getting warmer since the opponents get closer, more shots were fired.

Round 3:
The Soviets bring their tanks in position to rush a fast counterstrike but the Americans hold their ground. No casualities in this round.

Round 4:
The first kill for the Soviet tank platoon. The M60 got wrecked by the T-72. Now it is 3 versus 3.

Round 5:
It is getting hot. Both T-64 got destroyed, but Alpha 66 and his brave crew got also destroyed. This had a drop on the morale of the Americans since not only a heavy hitter is gone but also its valuable equipment.

Round 6:
The last remaining Soviet tank tried to rush and to destroy the remaining Abrams tank, the M109 would be an easy target. But the dice decided that the battle would went on for another round.

Round 7:
In a desperate attempt the T-72 held position and tried another time to score a close range hit but missed with all its dice, just as its opponent, the M1 Abrams. But the American artillery scored a fatal hit on the last Soviet tank and blew it away.

A first victory for the Americans in this new war. But US intelligence warns that the next attack may be be supported by heavy helicopters.

-

This game made fun, just as its predecessor, the rules are easy to understand, if you played ww2 TANKS then there are not much new rule elements. The use of artillery, even when they are custom units, has a big advantage, the US M109 destroyed two tanks.
Now since we played a first game, it is time to finish the 1:100 helicopters I already started, pick up the heli expansions at the Tactica to get their cards and then it is time for a revanche.
Will the Soviets dominate next time?

But before we will do that, we have planned to play a TANKS fun game of a ww2 tank platoon versus a ww3 tank platoon, just to see if the games are compatible. A coin will decide which ruleset we will use for that.

January 29, 2019

1:72 Modellcollect
Fist Of War
E-75 128mm Flak Zwilling

A closer look at the E-75 128mm Flakzwilling, produced 1:72 by Chinese manufacturer Modelcollect. Their "Fist Of War" range includes lots of walker styled tank modelkits and a lot of "What if..." kits. If you visit their homepage you will get an overview about their www2 range.

Let us take a look of the content of the box.
Beside the well made full colored construction manual, the box was filled with a lot of sprues.

The first two sprues belong to the main hull of the tank, or whatever you may call this. The cast is very nice without any flaws or visible ejectormarkings. A nice highlight are the tools which are casted as single parts.

The following sprue is included twice and has all parts to build the legs of the tanks, two per sprue. According the the construction manual, they can be build movable. As mentioned before, the cast is flawless.

The next sprues are for the main arnament of the tank, the 128mm Flakzwilling.

The sprue including the barrel comes twice, the remaining parts for the gun are included in a third sprue. These nice casted parts will sure result in an impressive double-barreled gun.

The final sprue included in this kit includes all parts for the close range weapon of the tank, a Kugelblitz turret at the bottom of the hull. The muzzles of the barrels are finely casted. Using this gun against infantry seems a little overkill to me, but maybe in Modelcollects 1947 some things went different then in our 1947.

Last but not least there is a set of decals included which contains some generic tanknumbers and Balkenkreuze, there are also two pairs of unit insignia decals including custom turret numbers. They will be stored in the scrapbook, maybe I will use them on another kit. This kit will be built without any decals or markings.

This is a nice modelkit, produced in high quality, with a strange weird world war two theme. I can recommend it, seems like it would make a lot of fun to build.

Even if you would not build the kit, you would get a nice 128mm Flakzwilling which could be used as stationary gun for a diorama, and the Kugelblitz turret would theoretically on a Panzer IV hull. And then the walker parts are still left for a kitbash.